How to Clean Your Dog’s Ears Safely
Table of Contents
Does Every Dog Need Ear Cleaning?
No. Some dogs with healthy, clean ears may never need their ears cleaned at all. Over-cleaning can irritate the ear canal and may even lead to infection.
Cleaning makes sense when you notice debris, discharge or an odor while checking your dog’s ears. Your vet can tell you how often your own dog’s ears should be cleaned, since it depends on the dog.
Why Ear Cleaning Matters
A dog’s ear canal is shaped differently from ours. It runs down and then turns horizontally toward the eardrum. Because of that turn, wax and debris deep in the canal can’t always work their way out on their own. If that material stays put, it can cause itchiness and may contribute to ear infections.
Dogs that are prone to ear infections often benefit from more regular cleaning. Dogs that swim often or have floppy ears may need extra attention too. Cornell’s Riney Canine Health Center notes that swimming in lakes, rivers and streams is a common trigger for infections, especially in dogs with drop ears.
Check First: When Not to Clean at Home
Cleaning is routine care. It is not a treatment for an ear problem. Before you start, look at the ear and gently sniff it.
Hold off and call your veterinarian first if you notice any of the following:
- Redness or swelling
- Obvious pain when you touch the ear
- Discharge, pus or a strong, foul smell
- Very heavy, dark brown or black wax
- A head tilt or loss of balance
Red, inflamed or painful ears may mean an infection or even a ruptured eardrum, and cleaning could make that worse. Some vets also prefer that you don’t clean the ears before an appointment, so they can examine them as they are.
What You Need (and What to Skip)
Supplies
- A good-quality ear cleaner made for dogs, ideally one your veterinarian recommends
- Cotton balls or gauze squares
- A towel, because you will get splashed when your dog shakes
- Treats to reward your dog
You don’t need special equipment. Many vets suggest using a cleaner that’s at room temperature, since cold liquid can be unpleasant in the ear.
What to Avoid
- Cotton swabs (Q-tips). They can push debris deeper into the canal and risk injuring the canal or eardrum.
- Cleaners containing hydrogen peroxide or alcohol. These can irritate the ear canal, especially if it’s already inflamed.
- Home mixtures and over-the-counter wax removers unless your vet approves them. Ask what they recommend for your dog.
How to Clean Your Dog’s Ears Step by Step
Pick a calm moment, such as after a walk, when your dog is relaxed.
- Get into position. For a small dog, sit with the dog on your lap. For a medium dog, sit on the floor with your dog between your legs. For a large dog, have them sit with their back end in a corner of the room and one side against the wall.
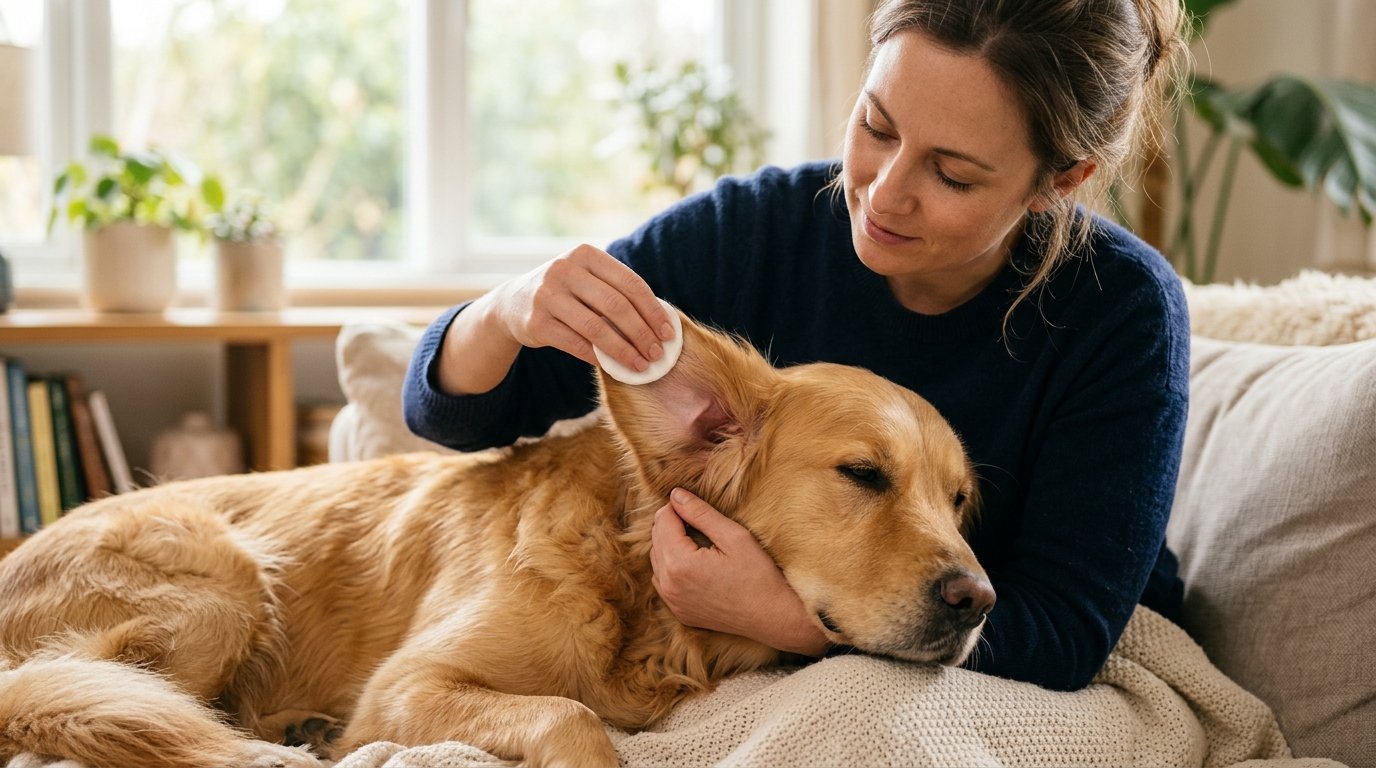
- Hold the cleaner in your dominant hand and gently lift the ear flap straight up with the other. This straightens the canal.
- Fill the canal with cleaner. Use enough to fill it. It’s fine if some spills out. Don’t push the bottle tip into the ear, and don’t let it touch the ear, since that can spread bacteria or yeast.
- Massage the base of the ear just below the opening for about 30 seconds. You should hear a soft squishing sound as the liquid loosens debris.
- Wipe the visible parts. With the flap still lifted, use a cotton ball or gauze to wipe the inside of the ear flap and the upper part of the canal.
- Let your dog shake. Shaking moves loosened debris and cleaner toward the opening. Stand back or hold up a towel.
- Wipe the opening again with fresh cotton or gauze. Only go in as far as your finger can comfortably reach, and never use a cotton swab.
- Reward your dog with praise and a treat.
- Repeat on the other ear.
If your dog seems to be in real pain at any point, stop and call your vet.
If Your Vet Prescribed Ear Medication
Ears are generally cleaned first, then medication is applied. Some cleaners can weaken or deactivate certain medications, so ask your vet whether you should wait between cleaning and applying the medication. Follow the instructions on the label and from your vet exactly.
How Often Should You Clean Your Dog’s Ears?
There is no single schedule that suits every dog. Dogs with healthy ears may need cleaning rarely or never. Dogs with allergies, a history of infections, lots of ear hair, or a love of swimming may need a routine from their vet.
A practical approach:
- Look and sniff regularly. A quick weekly check takes seconds.
- Clean when you see a reason, such as visible debris or mild odor, and the ear isn’t red or painful.
- Follow your vet’s plan if your dog has recurring ear problems.
Tips for Making Ear Cleaning Easier
- Practice handling the ears while your dog is relaxed, so touching them feels normal.
- Set everything out first so you can keep one hand on your dog.
- Pair cleaning with treats and praise so your dog learns to tolerate it.
- Ask for help if your dog squirms. A second person can steady them gently.
- Protect your eyes and your walls. A towel and an outdoor spot or bathroom make cleanup easier.
Common Mistakes to Avoid
- Cleaning too often. More is not better. Over-cleaning can irritate the canal.
- Going too deep. Clean only what you can see and reach with a finger covered by cotton or gauze.
- Using cotton swabs. This is the most common way owners accidentally cause harm.
- Cleaning an ear that looks infected. Cleaning prevents problems. It doesn’t cure them.
- Skipping the vet when symptoms persist. Itchy ears have many possible causes, including allergies, ear mites and infections, and each needs different treatment.
- Using cleaning products that haven’t been vetted. Check with your veterinarian before using anything new in your dog’s ears.
When to Contact Your Veterinarian
Call your vet if your dog shows any of these signs:
- Frequent scratching or rubbing of one or both ears
- Frequent head shaking
- Redness or swelling inside the ear
- Discharge, or a bad smell
- Pain when the ear is touched
- A soft swelling on the ear flap, which can be a sign of an ear hematoma
- Wax that looks unusually heavy and dark
Call right away if you notice a head tilt, loss of balance, or severe pain. Your vet can look inside the canal, check the eardrum, and identify what’s causing the problem. They may also recommend a cleaner suited to your dog.
Frequently Asked Questions
Can I use cotton swabs to clean my dog’s ears?
No. Cotton-tipped applicators can push wax and debris further into the canal and may damage the ear canal or eardrum. Use cotton balls or gauze instead, and only clean what you can reach with your finger.
What should I use to clean my dog’s ears?
A good-quality ear cleaner made for dogs is the safest choice, ideally one your veterinarian recommends. Avoid cleaners with hydrogen peroxide or alcohol, which can irritate the ear. Different cleaners suit different needs, so ask your vet which one fits your dog.
Is some ear wax normal in dogs?
Yes, some wax is normal. But if you see very heavy, dark brown or black wax, discharge, redness or a strong odor, have your vet examine the ear rather than cleaning it yourself.
Should I clean my dog’s ears before a vet appointment?
Ask first. Some vets prefer to see the ears as they are, because cleaning can hide signs they need for diagnosis.
Why does my dog shake their head after I clean their ears?
Head shaking after cleaning is normal. It helps clear leftover cleaner and loosened debris from the canal. If your dog keeps shaking their head long afterward, or seems uncomfortable, contact your vet.
Conclusion
Healthy ears need only occasional, gentle care, and some dogs need very little. Use a vet-recommended dog ear cleaner, fill the canal, massage the base of the ear, let your dog shake, and wipe away only what you can see. Skip cotton swabs, peroxide and alcohol, and don’t clean an ear that’s red, painful, smelly or discharging. If you’re unsure, a quick call to your veterinarian is always the safer choice.
Veterinary References
- VCA Animal Hospitals, “Instructions for Ear Cleaning in Dogs”: https://vcahospitals.com/know-your-pet/instructions-for-ear-cleaning-in-dogs
- VCA Animal Hospitals, “Top tips to clean your pet’s ears with confidence”: https://vcahospitals.com/resources/conditions-cat/eyes-ears-nose/top-tips-to-clean-your-pet-s-ears-with-confidence
- Merck Veterinary Manual, “How to Clean Your Dog’s Ears”: https://www.merckvetmanual.com/multimedia/table/how-to-clean-your-dogs-ears
- Cornell University Richard P. Riney Canine Health Center, “Itchy ear problems”: https://vet.cornell.edu/departments/riney-canine-health-center/canine-health-information/itchy-ear-problems
- Ontario SPCA and Humane Society, “How to clean your dog’s ears”: https://ontariospca.ca/blog/how-to-clean-your-dogs-ears
This article is for general information and does not replace a veterinary examination.